This article outlines how System Administrators can view and update the predefined values (Managed Lists) used in the Contracts Management module. You will learn how to access these lists and the specific details for each one. Use this when you need to add new values, modify existing ones, or update list settings.
Prerequisites
You must be a System Administrator.
Your license type (Lite or Advanced) will determine which Managed Lists are available to you.
Steps: View and Update Managed Lists
Managed Lists are accessed via the Contracts Management module's settings.
Navigate to the Contracts Management module.
Via the menubar: Click the app launcher icon.
Via the Homepage: Click the navigation tile.
Open the module settings by clicking on Manage Module tab in the top right.
Select the Lists tab.
Click on the list you want to update. A table of all current values will expand.
From this table, you can make changes to existing values or add new values, either individually or in bulk using the Import Templates function (for some lists).
To change an existing value: Click on the line item to open its details.
To create a new value: Click the plus (+) symbol to the right of the table, then enter all required details.
Save your changes by clicking on either Save or Save and Close in the top corner.
Results / Validation
After saving, the updated list values will be available for users to select in the Contracts Management module.
Troubleshooting
For bulk updates, if your changes are not reflected after import, ensure you have not changed the column names in your template, as this will prevent the system from correctly identifying the data.
What's Next / Related
How to use the Import Templates function for bulk updates
Managed List Reference
This section provides details for the lists managed by Administrators. Note that the fields you can manage depend on whether you have a Lite or Advanced Contracts Management license.
Contract Lists
| List Name | Where Specified | Purpose | Input | Scope & Notes |
|---|---|---|---|---|
| Contract Types | Contract Setup | Determines setup steps, visible information on 'Details', and available registers/functions. | Mandatory | You can find more information on creating and managing Contract Types here, |
| Contract Agreement Type | Contract Setup | Specifies the type of paperwork (e.g., internal vs. external agreement). | Optional | Can be hidden/removed by Administrators in module settings |
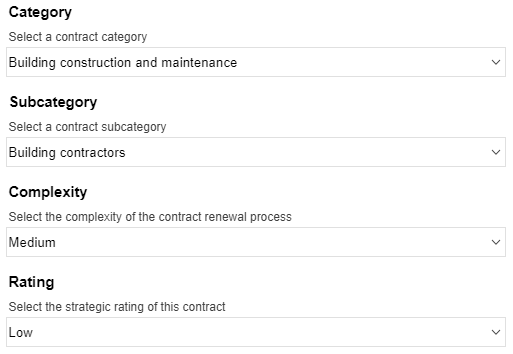
| Contract Categories | Contract Setup | Allows users to categorise by selecting a category and then a linked subcategory. | Optional | Always visible on contract setup. Note: This is a single list shared and managed in both Procurement Planning and Contracts Management module settings. |
| Renewal Complexity | Contract Setup | Captures the complexity level associated with renewing the contract. | Optional | Can be hidden/removed by Administrators in module settings. |
| Strategic Rating | Contract Setup or Vendor Record | Captures the strategic importance of a contract and/or supplier. | Optional | Can be hidden/removed by Administrators in module settings. Setup Details: Define the rating name (e.g., 'Low') and the 'Scope' (Contract, Vendor, or All). |
| Expenditure Types | Contract Setup | Captures an expenditure type (e.g., capital) when inputting the initial contract value. | Optional | Always visible on contract setup. |
| Cost Centres | Contract Setup | Captures the cost centre associated with the contract. | Optional | Always visible on contract setup. Setup Details: Define the Cost Centre Number and the Name/description. Note: This is a single list shared and managed in both Procurement Planning and Contracts Management module settings. |
Transaction and Feature Lists
| List Name | Where Specified | Purpose | Input | Scope & Notes |
|---|---|---|---|---|
| Variation Reasons | Raising a Variation (Price, Duration, T&Cs) | Specifies the cause of the contract variation. | Mandatory | Always visible on the variation form. |
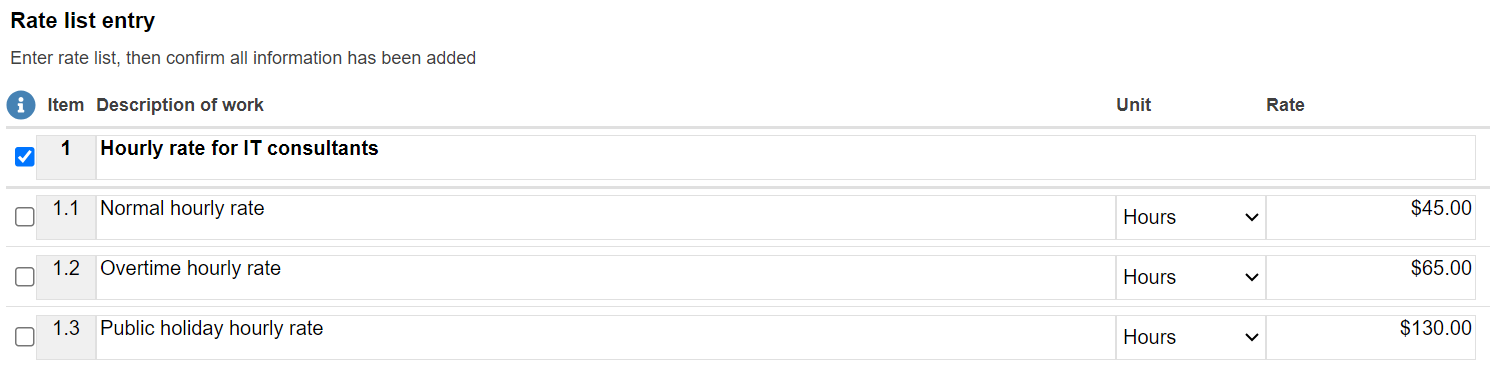
| Units | Schedule of Rates or Payment Certificate | Specifies the measurable unit (e.g., hours, weeks, items). | Optional | Only available for Advanced license holders. Always visible on Schedule of Rates and Payment Certificate forms. |
Compliance and Risk Lists
| List Name | Where Specified | Purpose | Input | Scope & Notes |
|---|---|---|---|---|
| Risk Types and Categories | Logging Risks | Allows users to categorise any risks associated with the contract. | Optional | Only available for Advanced license holders. Always visible on the risk form. Setup Details: Define the Risk Type name, Primary Objective, and Categories (including the four severity levels for each category). Note: This is a single list shared and managed in both Procurement Planning and Contracts Management module settings. |
| Compliance Types | Adding a new Compliance document to a vendor's record | Not specified. | Optional | Only available for Advanced license holders. Always visible on the compliance form. |
| Compliance Issuers | Adding a new Compliance document to a vendor's record | Captures the issuer of the compliance document. | Optional | Only available for Advanced license holders. Always visible on the compliance form. |
Import Templates Function
Use this function if you need to make updates to a list in bulk. The template will include all current values and columns for set values.
Steps: Using Import Templates
While on the Lists tab of the module settings, scroll down to the Import Templates section.
Select the relevant list from the drop-down menu.
Click to Download an import template, then open the template (contains existing items).
Update the template as needed:
To change existing items: Retain the RecordID (the unique identifier) and update values in subsequent columns.
To add new items: In a new row, leave the RecordID column blank.
Do not change the column names.
Save the changes made to your template in Excel.
Return to VendorPanel - a Unimarket Company and select to Import the template (ensure the correct managed list is selected).
A notification will confirm the successful import.